Bundle splitting allows you to delay loading resources until they are actually needed. And Webpack and React make it surprisingly easy!
In this article we'll take a React component that's not needed on every page and move it from the main bundle into a separate bundle that can be lazy loaded.
1. Make sure your dependencies are up to date
I'm using Webpack 4, and you'll need at least react and react-dom version 16.6.
If you're using TypeScript you'll also want to update @types/react to 16.6 or above.
2. Add chunkFilename and publicPath to your Webpack config
Add the two properties to the output property of your Webpack config file:
  chunkFilename: "chunk-[name].[contenthash].js",
  publicPath: "/assets/dist/"
Replace /assets/dist/ with the folder that contains your compiled bundles. This can also be a URL. The publicPath is needed so that Webpack knows where to fetch the chunk bundles from, once they are split into separate files.
While fileName is used for independent entry bundles, chunkFilename is used for bundles that are auto-generated by Webpack during code splitting.
3. Create a lazy loaded component with React.lazy
With React.lazy you can load a component dynamically and then treat it like any other component.
const MyComponent = React.lazy(() => import("./MyComponent"));
Note that this will only work if MyComponent is a default export of the module. For named exports you can use something like this:
const MyComponent = React.lazy(() =>
  import("./MyComponent").then((module) => ({
    default: module.MyComponent,
  }))
);
4. Optional: give the new bundle a name
Adding a webpackChunkName comment makes the bundle names generated by webpack easier to read. Otherwise you'll get file names like chunk-5.2b552c224d7ba3d07916.js instead of chunk-my-component.2b552c224d7ba3d07916.
import(/* webpackChunkName: "my-component" */ "./MyComponent");
5. Wrap your component with React.Suspense and provide a fallback
Instead of rendering <MyComponent/> directly you need to place it inside a wrapper component. You also need to provide a fallback that's rendered before the second bundle has been loaded.
<React.Suspense fallback="Loading">
  <MyComponent>
</React.Suspense>
The fallback can be a react element like a spinner, or just a string or null.
See the impact on your bundles
Your dist folder will now look something like this. I've shortened the hashes a bit to make it easier to read.
app.2dbb7a.bundle
chunk-vendors~my-component.fd9aaff.js
chunk-my-component.de9a232.js
The app bundle will be loaded during the initial page load, and the my-component files are loaded when MyComponent is rendered.
The chunk-vendors file contains the node_modules dependencies for MyComponent.
See the impact on your site's performance
There are two changes you should notice when looking at your website's performance.
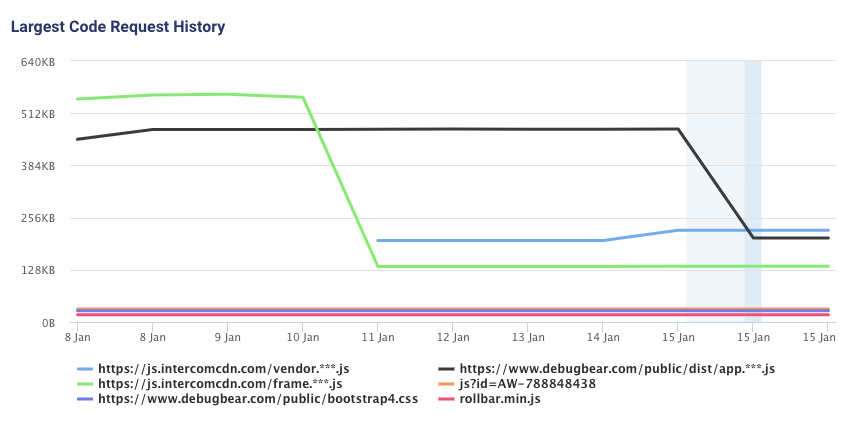
At a technical level, the size of your main bundle will drop. For some pages new bundles will be introduced.

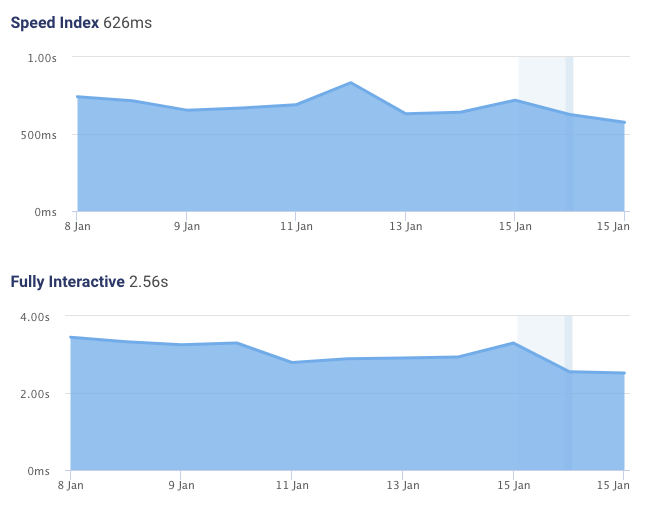
In terms of UX, the user will get a fully rendered and interactive website sooner. How big the impact is will depend on the amount of bundle size reduction, as well as other factors.

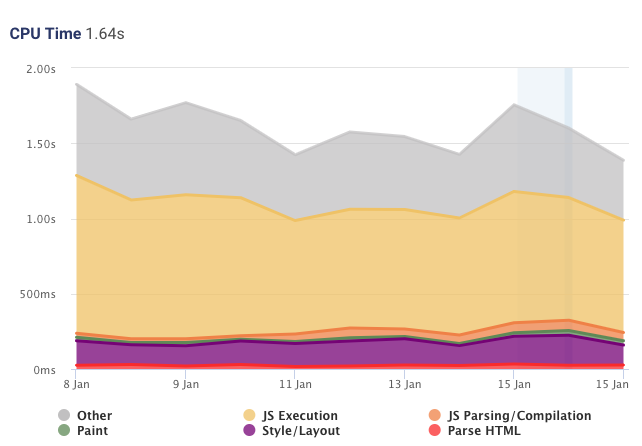
Part of the performance improvement comes from the reduced download size. But any JavaScript code that is loaded also needs to be parsed and executed, so we also save on CPU time:

Bonus: prefetch the bundle
If you expect the user to need the bundle soon you can tell Webpack and the Browser to load it when convenient:
import(
  /* webpackPrefetch: true, webpackChunkName: "my-component" */ "./MyComponent"
);
That way adding the bundle splitting won't cause extra load times when the user navigates to a page that does need the bundle.
Troubleshooting
If you forget to add a Suspense container or don't pass a fallback to it you'll get an error like this:
react-dom.development.js:17164 Uncaught Error: A React component suspended while rendering, but no fallback UI was specified. Add a <Suspense fallback=...> component higher in the tree to provide a loading indicator or placeholder to display.
If you get a 404 Not Found when loading the split off bundles you probably didn't specify a publicPath or the property has the wrong value.
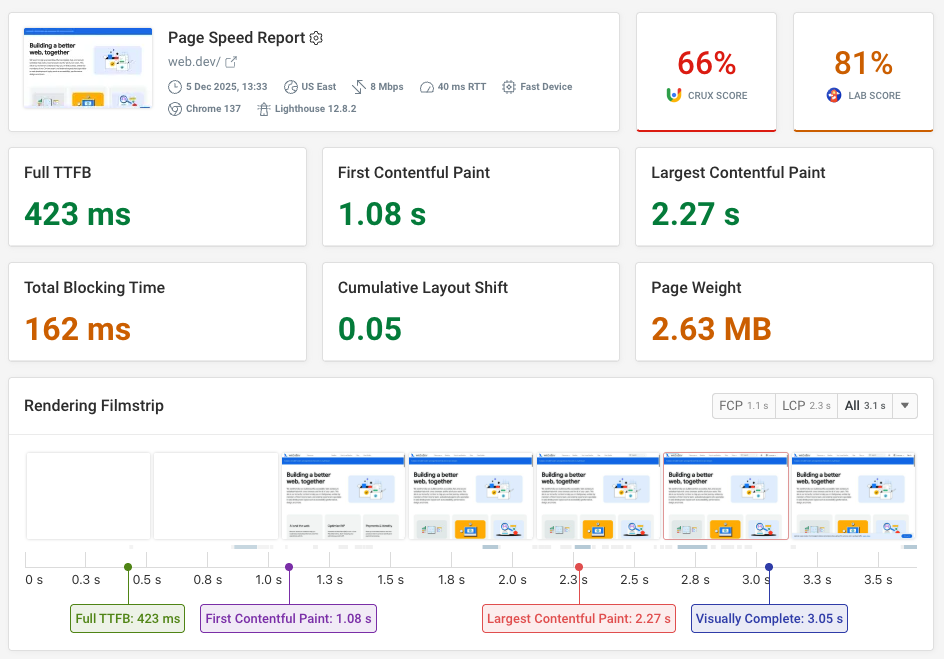
DebugBear also offers a similar view for INP elements - including an INP Component Breakdown, and has a number of CLS debugging tools. You can try these features out by running a free website speed test.


Run A Free Page Speed Test
Test Your Website:
- Automated Recommendations
- Detailed Request Waterfall
- Web Vitals Assessment