
In this article, we'll explore how Chrome determines the request priority for images. We will explain how prioritization works and what optimization techniques you can use to ensure important images load faster.
Image requests are low-priority by default
By default, image requests are Low priority. The browser will instead prioritize requests that are render-blocking or part of the critical request chain.
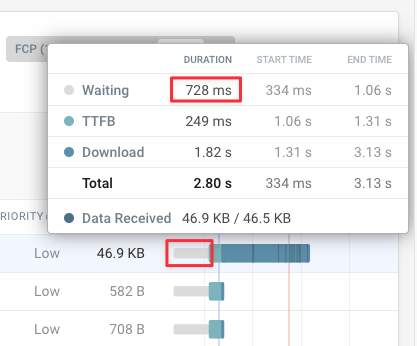
In this request waterfall we can see several low-priority image requests.

The grey bars on the requests indicate wait time, which is often over 700 milliseconds in this example. Chrome doesn't even bother requesting these resources until the page has started rendering.
Once the most critical page resources have been loaded Chrome starts loading the low-priority images.
Chrome loads resource in two phases. In the initial phase, tight mode, Chrome avoids spending resources to make low-priority requests.
Chrome boosts the first 5 large images
In Chrome 117, Google introduced boosting the priority of the first five large images from Low to Medium. This helps ensure that key images load faster.
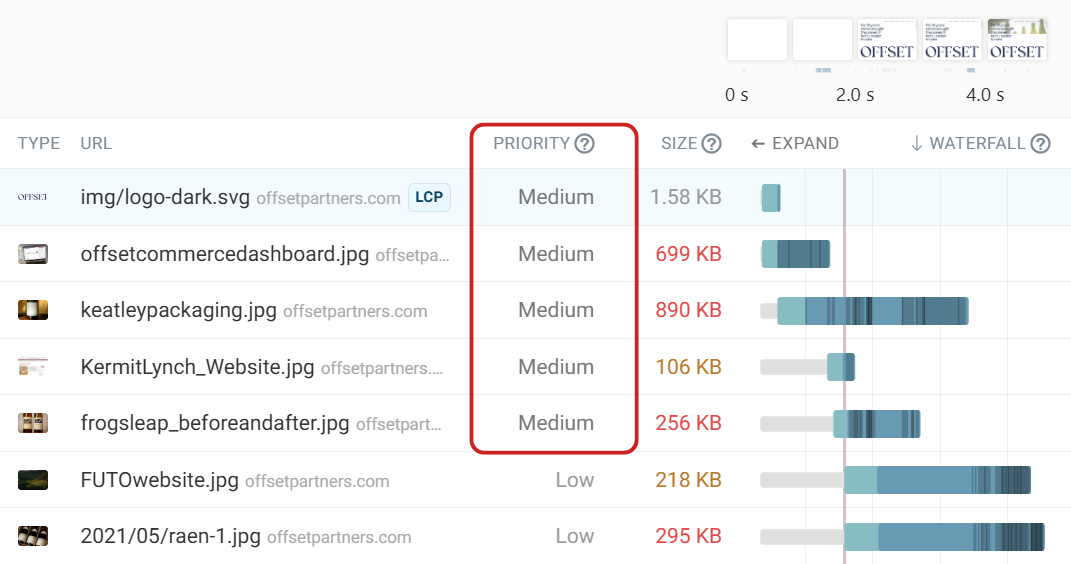
Previously, these images would have been Low priority by default. Below is an example request waterfall, showing five images that are assigned Medium priority due to this change. After that there are two images that remain at Low priority. This approach helps prioritize key images for a faster Largest Contentful Paint score while maintaining efficient resource loading.
What counts as a large image?
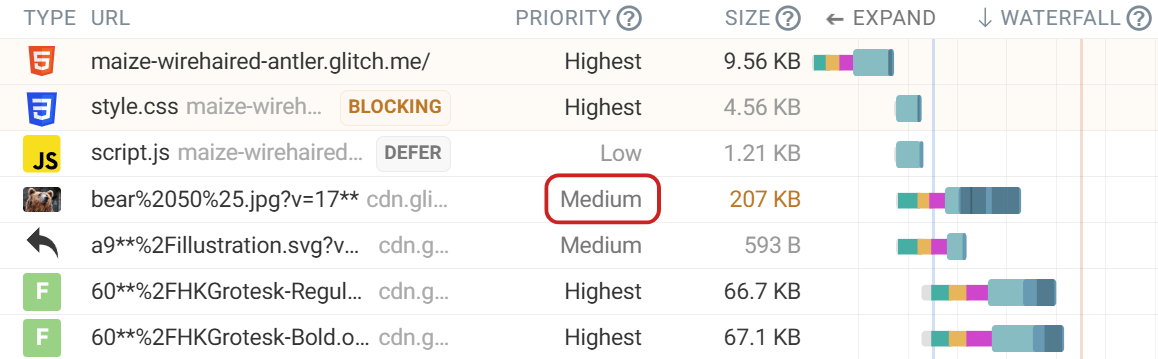
Any image above 10,000 pixels² is considered a large image and is eligible to be boosted to Medium priority. On this demo page, we added a large image and the initial request priority is Medium as expected.
When setting the image dimensions using the width and height attributes in the image tag to 10×10 pixels. Chrome no longer considers this image as large, resulting in a default Low initial request priority.
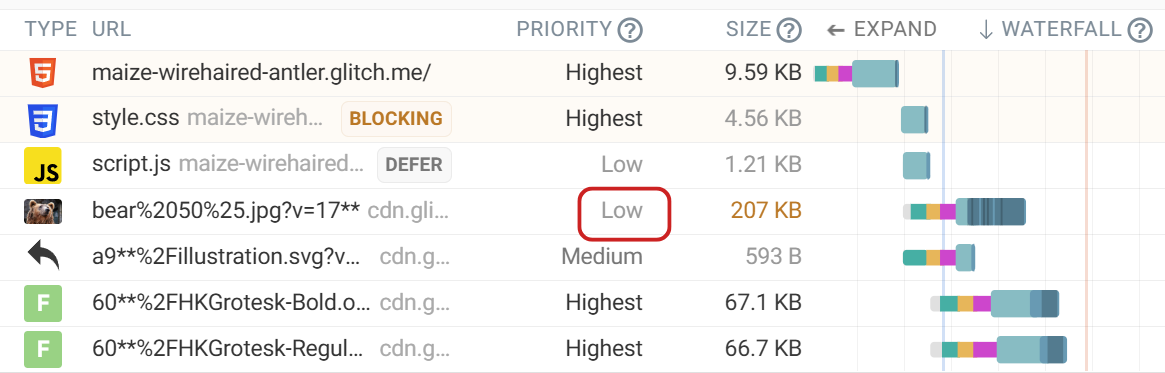
Chrome defaults to treating the image as a large image if no width and height is specified.
Images become high priority when they enter the viewport
We know that by default, all images are Low priority. An image only becomes High priority once it enters the viewport. This event occurs after the First Contentful Paint (FCP) marker. This poses a problem for LCP images, in most cases you will see a priority change to High during the page load.
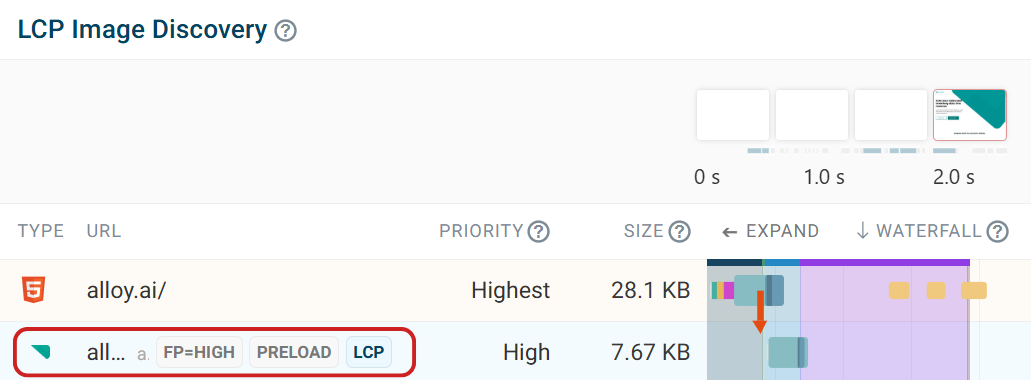
This change happens once the browser has begun parsing the document, giving a boost to render the image sooner than initially planned. DebugBear request waterfalls mark this priority change with a red marker, helping to identify a potential optimization.
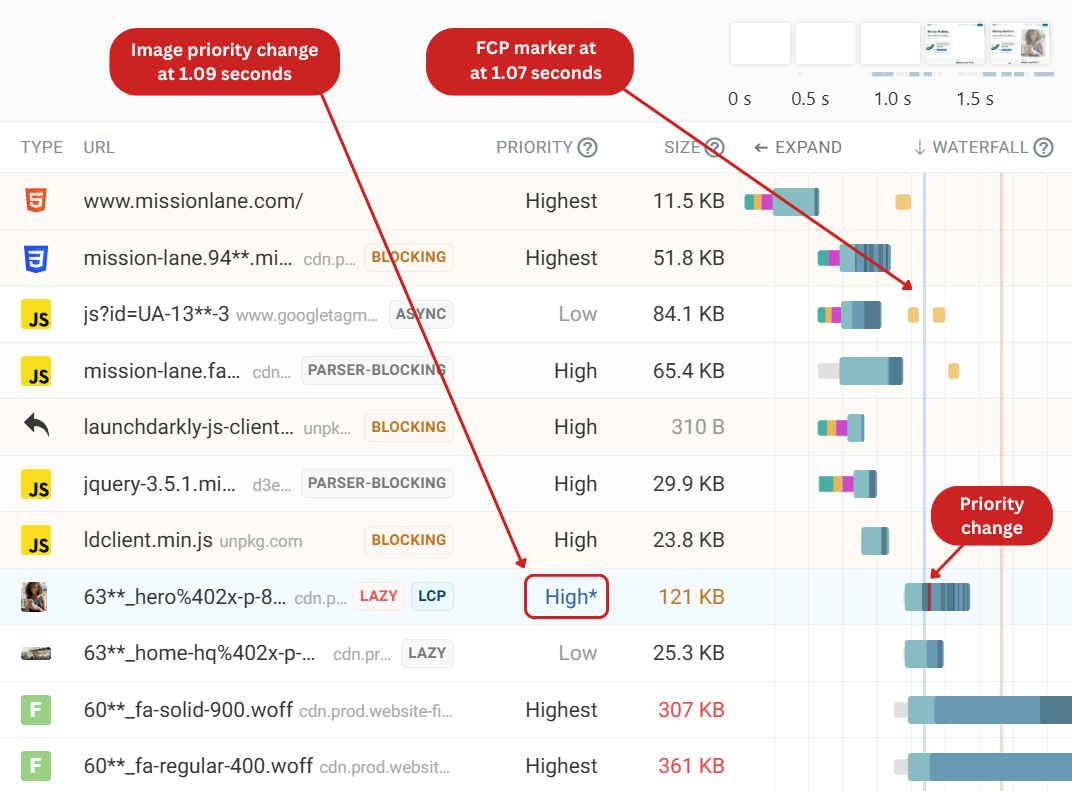
In this example, we can see an LCP image priority change. The FCP marker is at 1.09 seconds, then the LCP priority changes from Low to High 2 ms later as the image enters the viewport.
The other image request we see just below remains at Low priority, as this image appears below the fold.
Provide a priority hint with the fetchpriority attribute
Developers can control image loading priority using the fetchpriority attribute. Setting fetchpriority="high" or fetchpriority="low" overrides browser logic.
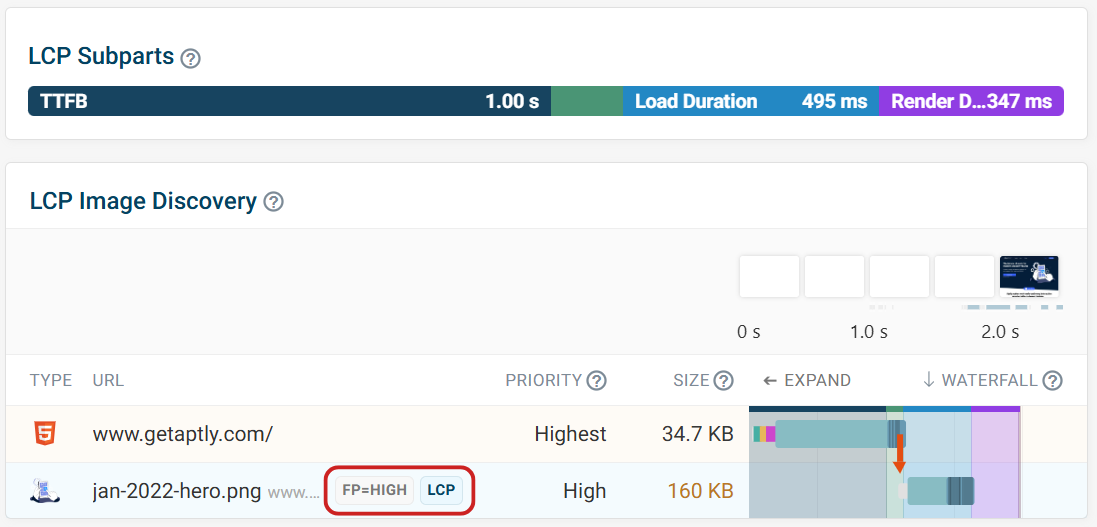
Setting fetchpriority="high" on an LCP image ensures that the browser prioritizes loading the image as soon as possible. Potentially providing a big boost to the LCP score, providing there are no underlying problems such as LCP Render Delay.
In contrast, a large image below the fold with Medium priority can be set to Low priority.
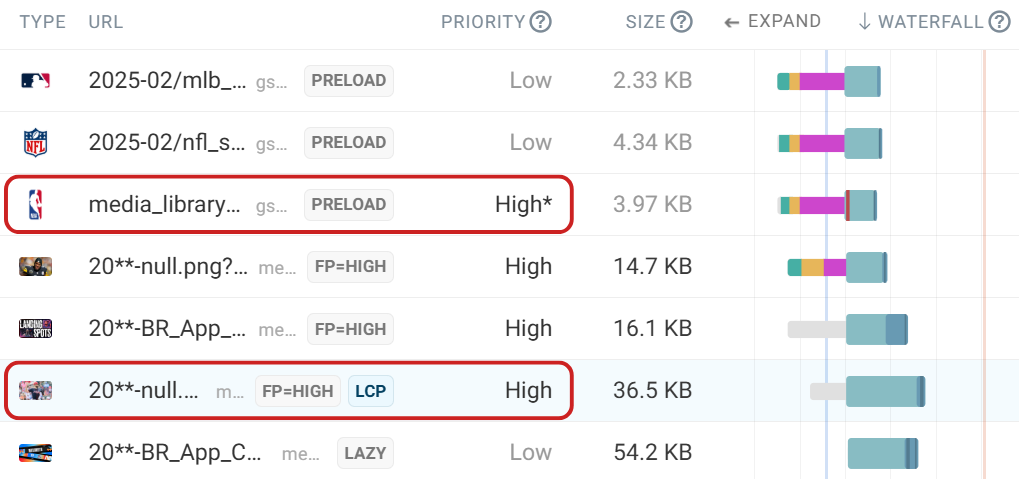
In this example, we tested a site where one of the 5 large images has the fetchpriority="low" attribute. Viewing the request waterfall comparison, we can see that there are now only 4 Medium priority images.
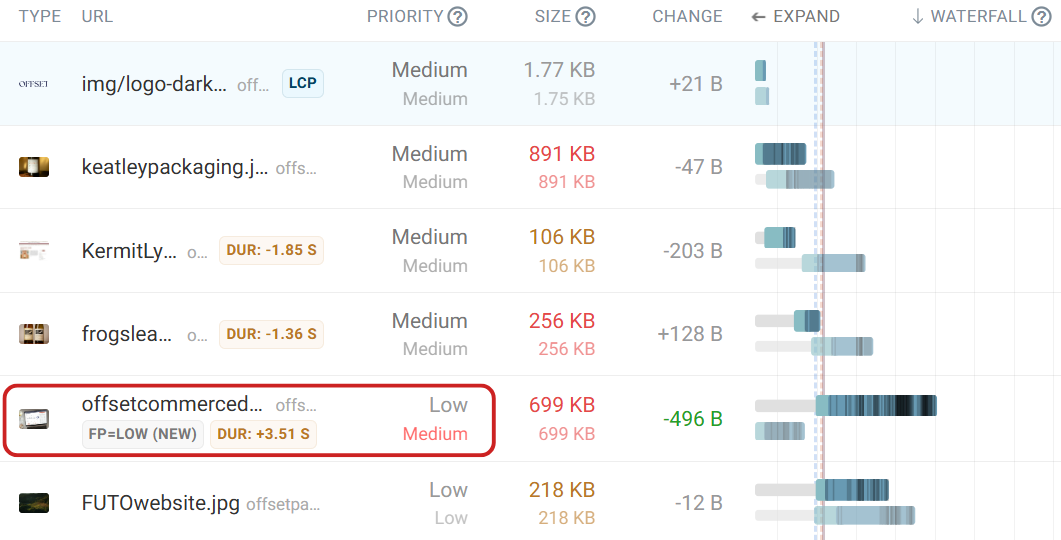
You should also check that your CDN or server actually implements HTTP prioritization correctly, or these changes might not actually have an impact.
Priority of image preload requests
Another way to manage loading is through preloading, which tells the browser to fetch resources earlier than usual.
Preloading is particularly useful for images that are critical to the page but wouldn’t otherwise load early enough, usually because they aren't directly referenced in the page HTML. Adding a preload to the HTML ensures the image starts loading early.
The priority of a preloaded resource matches the default priority for that resource. So an image remains Low priority when it's preloaded.
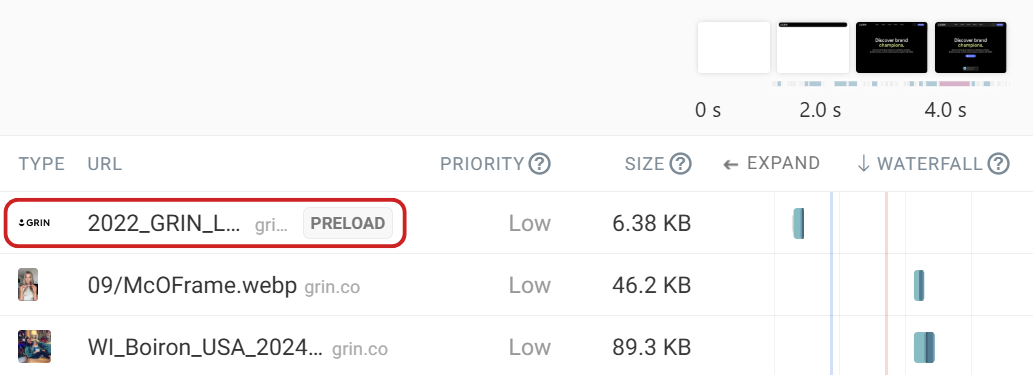
Adding fetchpriority="high"to the preloaded tag ensures an High initial request priority.
<link rel="preload" as="image" href="/image.webp" fetchpriority="high" />
This is a recommended optimization for LCP images and can be tested as an experiment with DebugBear.
Test request priorities on your own website
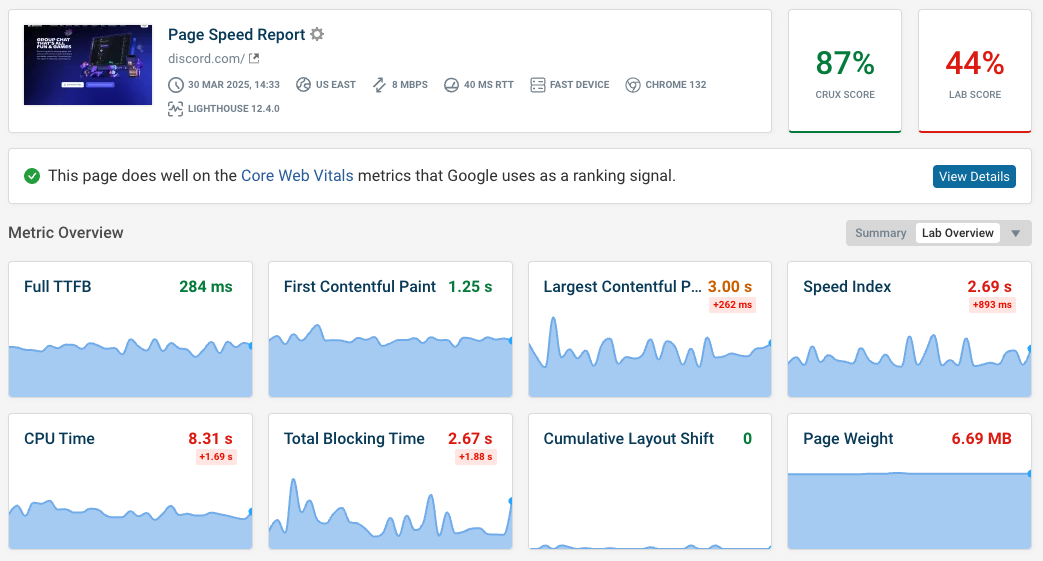
Use our free website speed test to identify potential optimizations mentioned in this article.
For example, in the test result we can see an LCP image which could be preloaded, and a preloaded image which has a priority change later on.
Monitor website performance
You can also use DebugBear to monitor page speed and Core Web Vitals on your website. Easily identify regressions and find ways to make your website load faster.


Monitor Page Speed & Core Web Vitals
DebugBear monitoring includes:
- In-depth Page Speed Reports
- Automated Recommendations
- Real User Analytics Data