Add Expires Headers For Better Page Speed
Expires headers are a website performance technique that can speed up some visits to your website.
In this article we explain how these headers work, how to add them, and how to measure their impact on performance.
What are Expires headers?
The Expires HTTP header tells the browser that it can store a resource in the browser cache. By caching static assets, subsequent page views are faster as these resources no longer need to be downloaded.
Typically assets like images, stylesheets, fonts, and JavaScript files can be cached.
An Expires header looks like this:
Fri, 10 Jul 2026 05:00:00 GMT
Cached resources can be re-used if the visitor needs the resource again before that date.
The timezone for the Expires header always needs to be GMT.
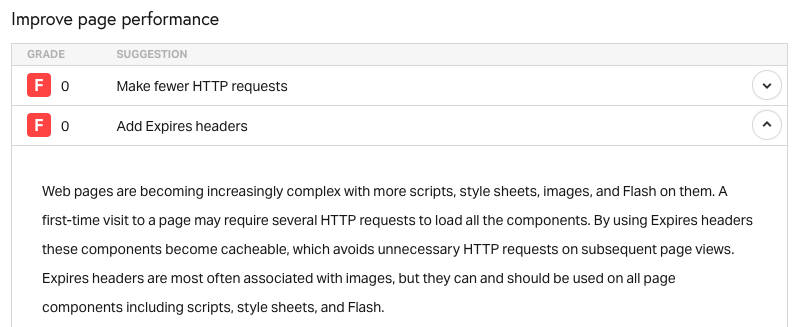
Add expires headers recommendation in Pingdom
The Pingdom speed test tells you whether adding an Expires header could improve the performance on your website.
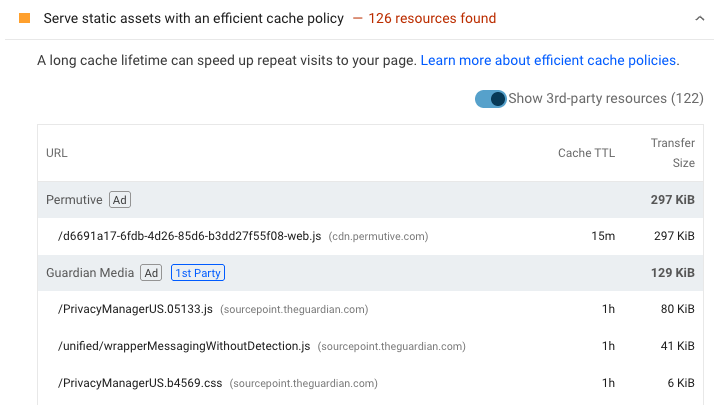
You can also use other tools like the DebugBear page speed test or PageSpeed Insights to check whether caching will make your website faster.
That way you can also see what specific resources could be optimized.
How to set an Expires header
The concrete steps you need to take to add the Expires header to responses depend on your hosting infrastructure.
For example, if your website is an Express.js app, you can add the header like this:
// Cache for 30 days
const expireAfterMs = 30 * 24 * 60 * 60 * 1000;
const expiresAt = new Date(Date.now() + expireAfterMs);
res.set("Expires", expiresAt.toUTCString());
Or, if you have an Apache .htaccess file, you can add new headers like this:
<IfModule mod_expires.c>
  ExpiresActive on
  ExpiresDefault "access plus 0 seconds"
  ExpiresByType text/javascript "access plus 30 days"
</IfModule>
Better page speed with cached responses
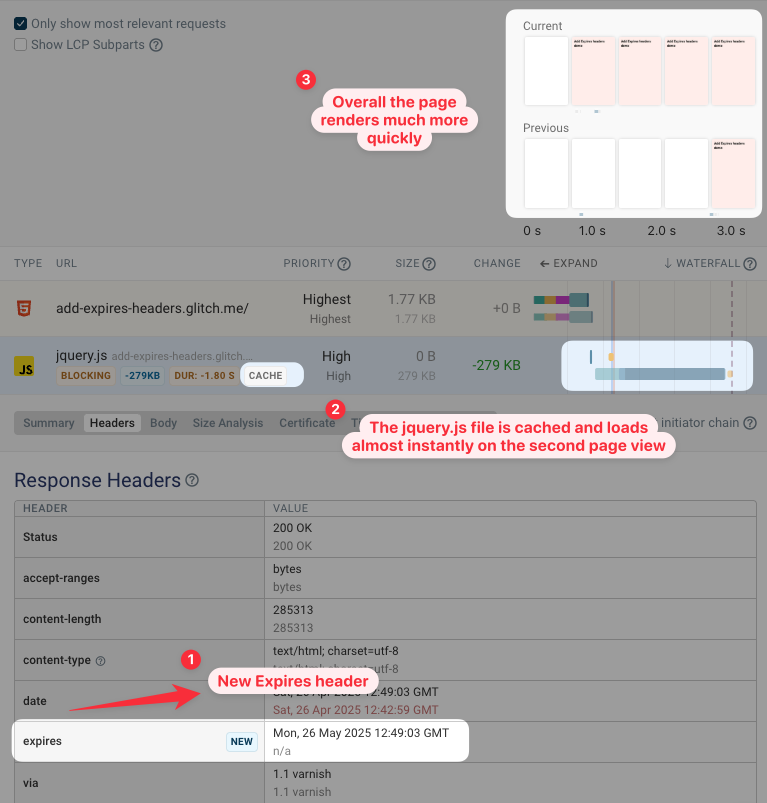
After adding an Expires header, your website will provide better performance for any subsequent page views. We can test this by enabling the Warm Load setting in DebugBear.
On the subsequent page load content appears much earlier than before. The jquery.js request in the request waterfall now no longer needs to be downloaded from the server and loads practically instantly.
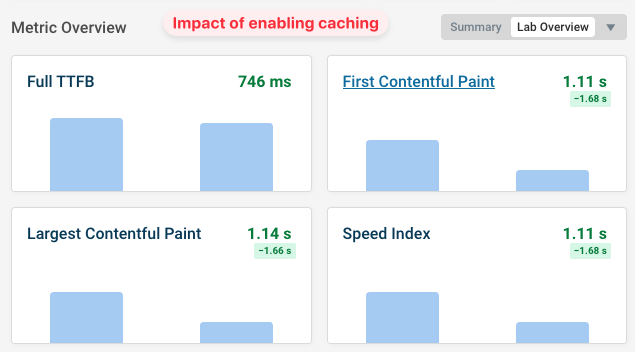
We can also see a big improvement in our website performance metrics. For example, the Largest Contentful Paint score dropped from 2.8 seconds to 1.1 seconds.
Faster website speed doesn't just provide a better visitor experience but also impacts Google rankings.
Expires vs. cache-control
The cache-control header is a more modern alternative to the Expires header. It provides more control of where content can be cached and what the caching logic should look like.
Rather than telling the browser until when to store the resource, you instead say how many seconds the resource should be cached for.
Cache-Control: 2592000
In most cases you should prefer the cache-control header to Expires. If a cache-control max-age value is set then the browser will ignore the Expires header.
Enable caching in WordPress
If you have a WordPress site you can enable caching in a number of different ways, for example by editing your server configuration directly or by installing a caching plugin.
Our in-depth guide to WordPress caching explains your options to enable browser caching in more detail.
Measure the impact of caching on real user page speed
You can test warm loads with DebugBear's synthetic website monitoring feature, but you can also set up real user monitoring on your website to see how fast it loads for real users and how many resources are cached.
The Core Web Vitals dashboard tells you how your website has been performing over time, and what pages cause a poor user experience.
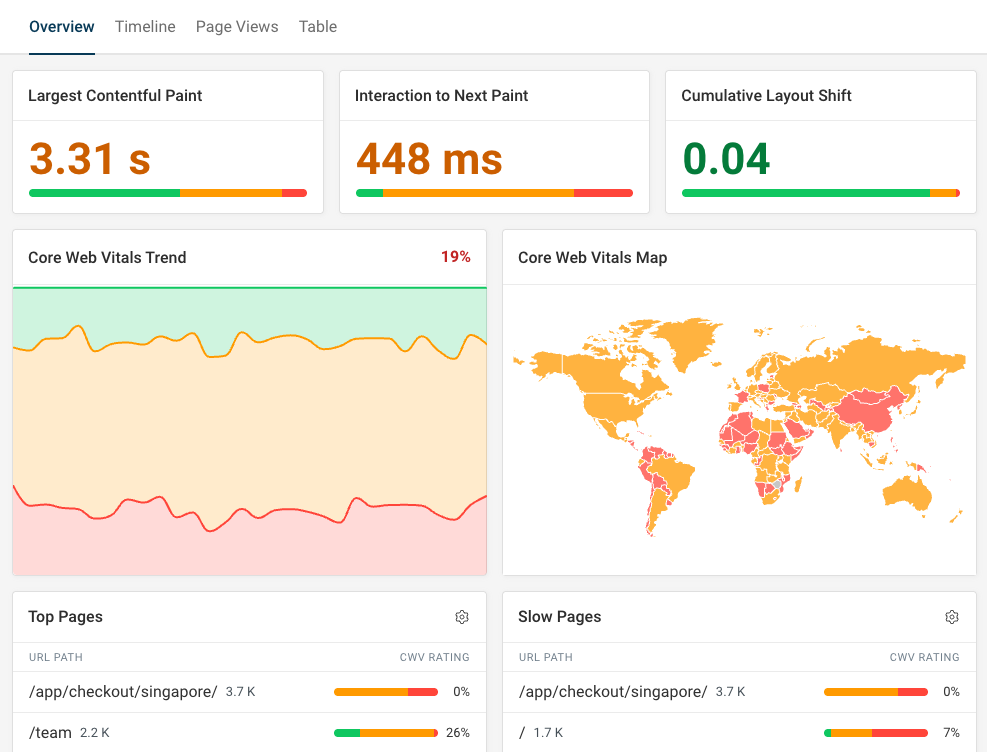
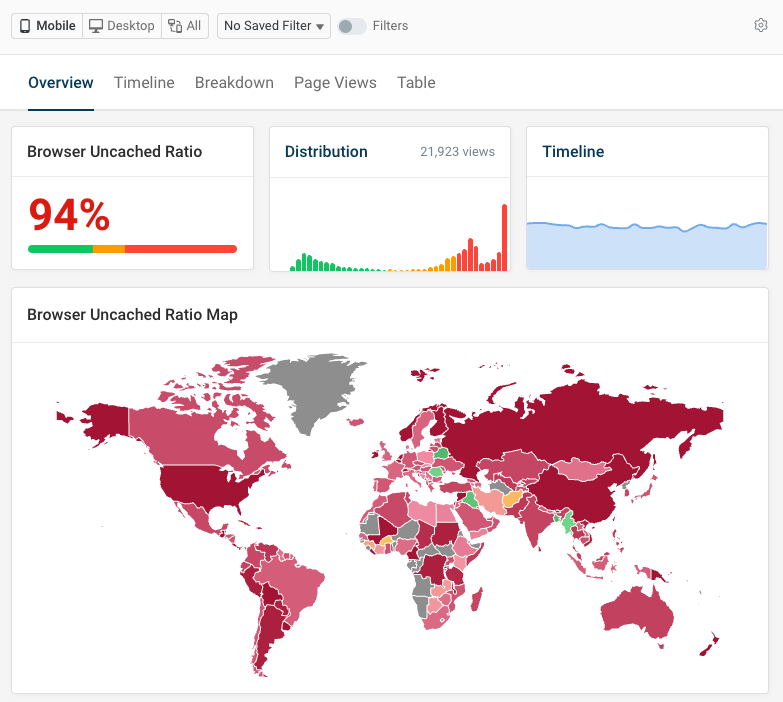
You can also track how often resources are served from the cache and investigate specific visits to see what you can optimize.
Chrome supports a browser API to report whether specific responses were served from the browser cache, so you can view that information for each request in the real user waterfall view.


Monitor Page Speed & Core Web Vitals
DebugBear monitoring includes:
- In-depth Page Speed Reports
- Automated Recommendations
- Real User Analytics Data